Background

Showing posts with label Recipe. Show all posts

Jan 10, 2014

Barley Water for Asthma and…..

I recently did some research on Barley water, and found some good information.   This information is not easy to find, nor common so I thought I would share what I learned.   I was initially searching for Asthma remedies when I came across this.  But it would appear that Barley water is actually a "magic potion" of sorts.  Don't discard your cooked barley afterwards either, as the barnyard animals would love to take care of it for you.  This is just a compilation of different recipes and thoughts that i found on the matter.  I have not authored any of this, or claim any rights to the info.

I also found a great article on the difference between Hulled and Pearled Barley here:


---------------------------------------------------------------

There is a booklet that is out of print, "Cookies for Dinner" by Faye Parker Reeves, and I have heard so many fantastic things from it. (I can no longer find a copy, but I spoke to the author today and it is currently being updated and a new version will be out soon.) My mom sent me this recipe out of it:

Faye’s method: 
 1½ t. to 1 T. barley 
 1 quart clean water, preferably distilled 
 After pouring off the cooked liquid, add 1 t. cream of tartar. Or add ¼ t. per cup 
when you drink it. 

Faye heats the water to almost boiling; pours it onto the barely; and lets it sit from 3 
to 24 hours. Then she pours off the liquid and drinks it throughout the day.

Ruth’s method: 
 Ruth cooks her barley like rice, adds a gallon of water, keeps it in the refrigerator so 
she has a week’s (or more) supply. Ruth drinks one cup of barley water with ¼ t. 
cream of tartar every morning and is now off her asthma medication. 
(Posted w/ permission from Faye.)


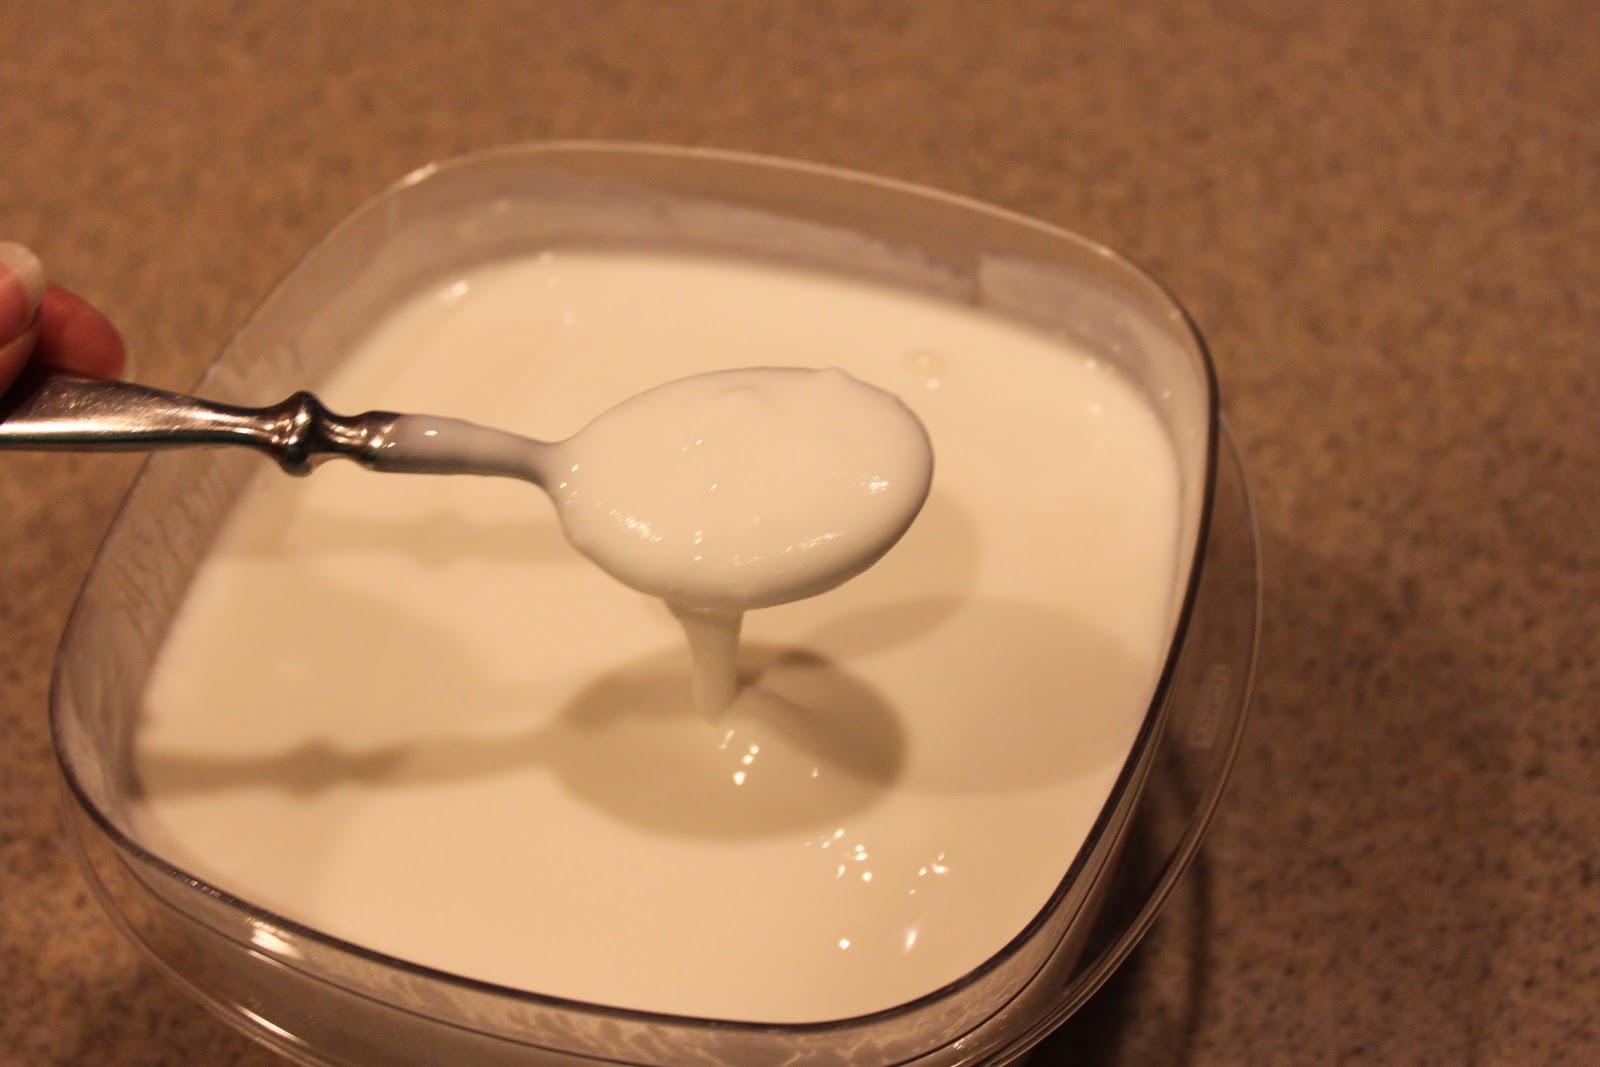
Home-made Barley Water
Barley water is a traditionally acclaimed drink which will support and nourish the kidneys in times of stress. It is an integral part of a kidney cleansing program, which will produce tremendous overall benefits.

You will need:
1/2 cup of whole barley
5 cups of water
1/4 of a Cinnamon stick
Grated Ginger
Freshly squeezed lemon juice

How to make:

Place the whole barley, water, the cinnamon stick, some grated ginger into a pan and simmer for 20 minutes.

After cooling, strain the mixture and finally add fresh lemon juice for extra flavour.

Drink between 1 and 3 cups daily
Ginger and Lemon Barley Water

2 litres water
1 cup caster sugar
150 grams pearl barley, washed and drained
2 lemons
100 grams fresh ginger, peeled and sliced

Remove the peel from the lemons, being careful not to leave any pith on the peel. Once this is done, juice the lemons.

Place the water and sugar into a saucepan and on a gentle heat, keep stirring until the sugar has dissolved. Add the lemon peel, ginger slices and pearl barley and allow to simmer for 30 minutes before removing from the heat.

Strain through muslin to remove the barley, lemon and ginger pieces and allow to cool.

When cold add the lemon juice - taste, and if necessary add more sugar if desired. Store in the fridge and serve over ice.

Lemon and orange barley water
I make my own barley water, a humble water with a simple history, probably English, and very refreshing on those fine summer days.


1 cup pearl barley (I would suggest Hulled instead)
2 litres filtered water
rind of 1 lemon
rind of 2 oranges
brown sugar to taste (about 2-4 tbsp)
juice of 4 lemons
juice of 4 oranges

Method
Put the barley in a fine sieve and rinse under cold running water to remove dirt or dust. Place in a pot and cover with the filtered water. Bring to the boil then simmer on low, covered, for 40 minutes.

Strain, keeping the liquid and discarding the barley. While the liquid is still hot, add the lemon and orange rind and the sugar.

Stir well. Leave to cool, then stir in the lemon and orange juice.Strain, discarding the rind, and refrigerate. Makes 2 litres.


Lemon barley water 
It immediately conjures up the magical image of white-clothed tennis players sipping the refreshing cordial during the change of ends at Wimbledon. Time please 

Makes 1.35 litres
Takes 10 minutes to make, plus cooling
Advertisement

Ingredients
2 organic unwaxed lemons
50g caster suger
125g pearl barley

1. Finely grate the zest from the lemons and place in a large glass bowl with caster sugar. Rinse pearl barley and add to the bowl with 1.2 litres boiling water. Stir well and leave to cool.
2. Squeeze the juice from the lemons and mix into the cooled barley water. Strain through a sieve and chill. Serve with lots of ice and the strawberry cream cheese sandwiches.


 I have tried barley water when suffering a severe asthma attack, and I can testify that it worked better and faster than an inhaler. (unsure who said this)
------------

FAQ:


* Does the water need to be stored in the fridge or is it safe on the counter? It is safe on the counter for the first 6 to 12 hours.

* How often should someone with breathing difficulties drink the water? As often as they want to. My sister drinks it every morning. After some friends learned about barley water, they don't drink anything else. It is food. You can't over dose on it. However, it may cause a cleanse and you may have symptoms for a while.

* What to do with all the barley you cook? My sister throws it away. My Chiropractor eats it. I used to save it in the freezer, and make beef barley soup. Maybe you can come up with another suggestion.

* Can you freeze the cooked barley? Yes, absolutely. I did freeze some, but I forgot to label it. My son threw it away. Thank you for the reminder. I do not drink it on a regular basis. So, I want to have some for emergencies, and having it in ice cubes would be the best way to do that.

Until Friday evening, I would have told you that the cream of tartar is very necessary. However, since then, 2 people have told me the barley water works wonders even without the cream of tartar.

I have never thought about sealing/bottling barley water. Yes, I think that would be great. Leave the barley in it. 

I made some rather strong barley water, put it into ice cubes, and planned to transfer them to a plastic bag. Before it got into the plastic bag, my son threw away the cubes from the tray. I guess I should try it again.

However, in an emergency, just pouring warm water on the barley, and drinking it will do something. My other sister throws a few kernels into a cup, pours hot water on it, waits 5 to 10 minutes, and drinks it. 

I just thought of another way to have this on hand, just in case of emergency mind you. Go to Harmon's and buy a bottle. It is expensive. But, one bottle would be enough to give us time to make a batch.

Be sure to get the raw barley. 

----------
Sooo, after reading this 2 plus days ago, I came home and soaked some barley overnight and have drank my barley water, cream of tartar mixture for 2 mornings now. I love it! No, I don't have major breathing problems. I am stuffed up all the time just to make life a little miserable. I can smell things again!! Thanks so much 
--------------
In the recipe to make Barley Water, it calls for a pinch of salt. 

Leave it out. 

When cooking any grain, salt toughens the outer layers, and keeps the minerals from being released. If you want the taste of salt, add it after it is cooked. This rule goes for all grains, including rice.

---------
I have to say this stuff is great. I was having problems breathing all night and this morning was having a mild asthma attack (first one in over 3 years).X and XXX helped, they had some and both I and my husband drank it down and within minutes I could breathe again without feeling like my lungs would explode!!


Cream of tartar is  a very good source of Potassium 
-----------------------------------------------
Most of the above info came from the following thread on a forum:


Nov 20, 2013

Shells Famous Bean Burrito Mix!

Shell's Famous Bean Burrito Mix!  Can be made entirely from food storage if necessary! Freezes well too!


2 cups cooked rice
2 tablespoons olive oil
1 medium onion, diced
3 cloves garlic, finely minced

1 can of green chiles - Optional 
1 teaspoon cumin
Salt and pepper to taste
1 Can Diced Tomatoes

1 can (15 oz. each) pinto beans with liquid  (Or prepare from dry beans first)
1 can (15 oz.) Black Beans, drained and rinsed  (Or prepare from dry beans first)
1 1/2 cups water
1 (10 oz) package frozen corn or 1 can whole kernel corn, drained 

6 green onions, white and green parts finely chopped - optional
1/2 teaspoon onion powder

16 burrito-sized (10-inch) flour tortillas
2 cups shredded Monterey Jack cheese


(If using dry beans, pressure cook, or crockpot SEPARATELY, the day before) Cook rice; set aside.  Meanwhile, heat oil in large saucepan over medium heat. Add onion, garlic, and cumin; season with salt and pepper. Cook, stirring occasionally, until onions are softened and golden, being careful not to let the garlic burn.   Add can of pinto beans with juice and mash gently in the pan (a potato masher or fork works great here). Add the can of black beans and the water and stir to combine. Bring to a boil, reduce heat to medium and simmer, stirring occasionally, until thickened, 10-12 minutes, being careful not to let the mixture stick to the bottom of the pot. Add diced tomatoes and corn; cook to heat through, 2-3 minutes. Stir in onion and garlic powders. Remove from heat; stir in green onions (if using) and cooked rice.

Heat tortillas in microwave for about 30-45 seconds or until all are warmed through. 

If eating fresh, layer burrito mix, shredded cheese, avocado, and even lettuce and tomatoes if desired.

This recipe works great prepared ahead and made into freezer burritos.  Just be sure to use the small fajita size tortillas, otherwise it is hard to reheat them.  They are cold in the middle if you make them too big.


Recipe adapted from Mel'sKitchenCafe.com

Sep 13, 2013

Frozen Shoulder Syndrome - Natural Remedy

Frozen Shoulder is the lay mans term for what is medically termed  "Adhesive Capulitis."  Most Dr's will say that they do not know what causes it, and that there is no known "cure".

My experience with this "disorder" started when I woke up in the middle of the night in excruciating pain, unable to move my shoulder, arm, or even the slightest movements in my hand.   I had not had an "injury" so to speak with my arm, and had even been playing volleyball every week for the last several months.  So a week later when I finally went to the Dr. and received this diagnosis, I was not comforted to hear that a typical Frozen Shoulder lasts usually a minimum of 2 months and as long as 5 years.  I have known people personally that have had surgery for correcting this problem as well.  Whether or not that is a reliable fix, I am skeptical.

As I mentioned before, they don't know what causes it.   Honestly I think it is somewhat of a "copout" diagnoses that is given when everything else is ruled out.   No torn rotator cuff, no broken bones, etc.
I am not one who generally goes to a Dr. for advice, unless there is something beyond my ability to handle, and in this case it was the pain.  Once I got that under control, I was able to focus on fixing the arm myself.    When I DO go to a Dr., I use a Naturopathic Physician.

Through a weekly regimen of massage, stretching, and using Essential Oils, I was able to see a huge improvement within 2 weeks from starting the treatments.  Now 5 weeks later, I would say I am at about 98% of normal function in the arm.   There are still signs of weakness from literally not using it for several weeks, but the ability and range of motion are totally back.

Just a note, not all massage therapists are equal.   It is necessary to have a MT that is well trained, and knows how to perform deep tissue massage WITHOUT bruising your entire body.   Bruising, though sometimes a side effect, is not the best way to accomplish healing.   You will definitely feel it later, but it should not overshadow the original problem you went in for.    And a good MT will tell you to drink lots of water to flush toxins out of your body, as well as ice the areas that deep tissue massage was performed.  It is also important to listen to your body, and let your MT know if something is hurting more than is good, and if you think you need to stop.

Although my knowledge is really quite small about exactly how Essential Oils work and the science behind using them, I did look up some instructions on how to create blends for yourself, and I created a recipe that worked for me in helping with the inflammation and healing of my Frozen Shoulder.

It is important to ad the oils in the order they are listed:

Added in the following order:
1 oz. Fractionated Coconut oil (or fill a 10ml bottle 3/4 full with Fractionated Coconut oil)

Winter green - 3 drops
Peppermint - 2 drops

Basil -15 drops
Birch  -10 drops
Frankincense -8 drops
Lemongrass - 15 drops

White Fir - 12 drops

Lavender - 4 drops
Lemon - 4 drops

Now just to cover my @$&  I need to say that these statements have not be evaluated by the FDA and that this information is not intended to be used as medical advice as the author is not a physician.  This recipe has not been proven to treat, diagnose or cure any of the above mentioned ailments.  Blah blah blah, yadda yadda... :-)

May 29, 2013

Homemade Laundry Soap


Ok for all you Preppers out there, here is a homemade laundry soap recipe.  My friend swears by it, and said she actually really likes it and prefers it to what she used to use from the store.  (Which was basically whatever soap was the cheapest that day.)  I'll admit, I am a little bit pickier.  OK a LOT pickier.  So I will stick with my Melaleuca detergent for now.  But I think its always good to know how to do this kind of thing if you needed to.  I also keep all the ingredients on hand in case I run out and can't order more of my favorite detergent.  

This is the liquid recipe:
1 bar grated Fels Naptha soap
5 gallon bucket
1 cup washing soda (Arm and Hammer)
1 cup 20 Mule Team Borax
4 1/2 gallons hot water
Put grated Fels Naptha in saucepan and cover with water. Heat on low until dissolved. Fill bucket with hot water and add soap. Stir to combine. Add 1 cup washing soda and 1 cup borax and mix well. As it cools, it will thicken. About 24-48 hrs. If mixture becomes too thick, add hot water to thin it to desired consistency. May be used immediately. Mix well before each use. Use 1/2(normal) to 1 cup per load (heavy).

This is the powder recipe:
Powdered Laundry Detergent

1 cup grated Fels Naptha Soap
1/2 cup washing soda
1/2 cup 20 mule team borax
Mix and store in airtight container or bag. For light or small loads, use 1 tablespoon. For normal loads, use 2 tablespoons. For heavy loads, use 3 tablespoons.
To make a large batch - grate 6 bars of Fels Naptha Soap and then add 3 cups of Washing Soda and 3 cups of 20 Mule Team Borax. Mix well and store in covered container.

TIP: The above recipes will NOT make suds in your washer so don't be alarmed. Fels Naptha Soap is a pure soap and typically makes little or no suds in the water. This makes it perfect for use in the new HE washers as well as tradional washers. You will also notice the need to either reduce your laundry softener or in most cases you can even eliminate the use of softener completely.  -site unknown

May 12, 2013

Tres Leches Cake, Happy Mothers Day!


My husband is from Mexico, and there is nothing he loves more than a good Tres Leches cake.  If you haven't brushed up on your spanish lately, Tres is the number 3 and Leche is milk.  So it is essentially a 3 milk cake.   The cake is a basic sponge cake, but its the 3 milk syrup that makes this cake divine!

My father in law was so excited to eat this at the family party yesterday, he could hardly stand the wait, and was chanting "I want cake, I want cake!" while we were getting everything ready.  :-)  After the first bite he was shocked and surprised by what is little whitey DIL could pull off!  :-)

This recipe came from my cousin Rachel, who also married a man of latin decent.   She is photographer, prepper, chicken owner, and a cake baker extraordinaire! Theres nothing this girl can't do.   If you are in Idaho, check out her site:  PortraitsbyRachel.com


(I have to admit though, I cheated and took shortcuts all the way through it, and my cake Still came out!  See her tips at the bottom for a perfect cake.)

Preheat your oven to 350. Grease and flour your pan(s) (this will fit in two 9 inch pans or  an 11x13, or even a bundt pan works nicely--  I doubled the recipe and put it in a 1/4 sheet cake pan, 11 x 16).

Sponge Cake for Tres Leches

1c. Sugar 
5 lg. Eggs, separated 
1/3 c. milk 
1 tsp. Vanilla extract 
1 c. flour

Beat 3/4c. sugar and egg yolks until light & fluffy (I used my Bosch with the wire beaters)
Pour Mixture into a separate Mixing bowl and rinse your Bosch.
FOLD milk, vanilla and flour into yolk mixture. (Be gentle- it doesn’t need to be mixed perfectly, just sort of integrated) 
Beat egg whites in the Bosch (or other stand mixer) until soft peaks form. 
Add leftover sugar and beat until glossy and firm. 
FOLD egg whites into mixture.


*Bake 30-45 minutes until firm (Depending on your pan sizes,  baking time might be different. You could check it at 20 minutes to be sure. Test with a cake tester or think sharp knife and see if it comes out clean, and the cake begins to pull away from the sides.)
Milk Syrup
12 oz. Evaporated milk 
1c. sweetened condensed milk 
1c. heavy or whipped cream 
1 tsp. Vanilla extract 

(Mix all ingredients together well.  I used a blender for ease of mixing and pouring.)

Cool completely and pierced liberally with fork. You can dump the cake out and cool it on a baking rack if you want, and then put it back in the pan for the milk syrup part.

When cooled and pierced, pour syrup over cake.  Pour in small amounts, waiting for liquid to absorb.  The first photo below is after pouring most of the syrup over the cake.  The second photo is after the syrup has soaked in.  You can keep any extra in the fridge. 


Ice the cake with whipped cream or cool whip. (I used cool whip) Top with sliced strawberries, Kiwis, Pineapple, or any fruit you like.


Some tips from my cousin Rachel:
"Yeah, it’s a sponge cake. It waits for no one. Have EVERYTHING ready. The key to getting this to rise well is to be quick, but gentle- especially with the eggs- they are your leavening.  Have your pan and oven ready.  Room temp ingredients work nicely. You can run the eggs under hot water in a bowl in your sink for 3 minutes or so- that should get them warmed up but not cooked! You can also beat the whites over a bowl of warm (not hot) water. Milk can go in the microwave for 20-30 seconds to slightly warm to room temp. I would also sift that cup of flour in. Take pictures! "


I just had to include some of these fun shots from the last time we made this cake.  Dad's Birthday!  My little helper was thrilled about her accomplishment, and the look on dad's face says it all!


Heres a closeup of the cake:


Mar 1, 2013

Homemade Yogurt Recipes and Instructions


I have made Homemade yogurt a couple times, and a couple different ways.  I also received a recipe from a FB friend on how she does it.  I will include everything I know and have found out and you can pick what seems like the best way for you to make it.

 First off this part is the same in all the recipes.  You have to heat milk on the stove until it is almost boiling, but not scorched.   You can use whole, 2%, 1% or skim milk, raw or pasteurized, but what you choose will affect the thickness of your final product.   I use fresh goat milk from our backyard farm.  It has a good amount of cream, but still produces a rather thin yogurt.  One thing I've read is that a lot of commercial yogurts have gelatin in them, which I personally don't want to ad, but another way to thicken is to ad Powdered Milk.   (2.5 Cups per gallon of milk)  You do this while its hot so it dissolves well.  Then you have to leave the milk to cool for a while until it reaches about 110-115º F.  Once it has cooled down you can mix in your starter.  There is freeze dried starter available from  Yogourmet at most health food stores, online at Amazon.com or you can just get a container of fresh natural yogurt.  It is best to get plain yogurt with as few ingredients as possible, and make sure it says that it CONTAINS live and active cultures, not just made from them.  Those cultures are what consume the milk and convert it into yogurt.   Also once you have made yogurt, or in my case got some from a friend.  You can save some and use it to culture the next batch.  I've heard this only works for about four or five times before it becomes to strong and sour.

Basic Recipe:
1 Gal. Milk
2.5 C. Powdered Milk (Optional)
4-6 oz. Yogurt, OR 2 packets freeze dried starter
Warmer of choice

   Once the milk is cooled some and the starter is mixed in, its time to "insulate" the yogurt so it can culture at the proper temperature.  There are about 100 different ways you can do this part.  The first time I made it, I used my Excaliber  Food Dehydrator.  It was tall enough once I removed all the trays, to stand up Quart size jars inside.  Then I just set the temperature for 110º and turned it on.  That kept the air around the jars at a steady temperature while the Yogurt was culturing.
     However, since then, I came accross a couple of yogurt machines I decided to try.  One is the "Yogourmet" Multi.  I really like this one because it is simple and straightforward.  It has one large 2 Qt. container that fits inside the main container which you fill with water.  The water bath method keeps the temperature nice and even around the yogurt.  I incubated mine about 7 hours and It worked great!   I also have the YoLife Yogurt maker by Yogourmet.  This one is basically a heated platform you can set several jars on, then it has a cover that goes over them, and it maintains the proper temp as well.  It also comes with a second taller cover for Quart size Jars.

  Also many people use a crockpot for the whole process, from start to finish.  it takes about 2.5 hours to heat the milk to the right temperature, depending on the crockpot. (approx 180º) Watch yours closely the first time and see how long it takes.  Then you have to let it cool several hours to the right temp. (110-115º)  Then simply mix in your starter, and wrap the crockpot in a large towel and let it sit 6-8 hours.  You could also use the water bath  method in the crockpot by pouring the milk into jars and then sitting them in the warm water inside the crockpot.
  The fourth and final way that I know of is using a small to medium cooler, and pouring hot water in the bottom.  After the milk has cooled and you ad the starter you would pour into quart jars or large plastic bowl and put into the hot water in the bottom of the cooler.  Then close the lid, wrap in a towel and let it do its thing for 6-8 hours.
    Once you have your finished Yogurt you can prepare and store it however you like.  Some people like to put sugared & chopped fruit in the bottom of small containers, and spoon the yogurt over the top.  Others will just keep a large container in the fridge plain.  Your plain yogurt also makes an excellent Sour Cream Replacement.  


Feb 11, 2013

Light, fluffy, Whole Wheat Quick Bread


10 1/2 c. Whole Wheat flour
1 T. Dough Enhancer
1/2 c. raw sugar or honey
1 Cup Applesauce
1 T. salt
3 T. SAF Instant Yeast
1/3 Cup + 1T. Coconut Oil
3.5 Cups hot water


I always use fresh ground flour.  I have a Nutrimill wheat grinder which is a dream.  So before starting the recipe I grind my flour fresh.


I used a Bosch Mixer which makes this recipe pretty much a no-knead recipe, because the machine does all the work for you.
(See video clips at the bottom of this post.)


Add 8 Cups of the flour and the rest of the dry ingredients, including sugar (but not honey) to the mixer first, and pulse to blend.
Pour the water in a large liquid measuring cup, and then add oil to the water.  pour in over dry ingredients and ad honey (If your using it) and Applesauce.

Replace splash ring on bosch and turn on to speed one until ingredients are basically blended.  You want to keep adding flour slowly until the dough starts to clean the sides of the bowl, as well as pull away in the center.  You may or may not use all of the flour.  This is where the trick comes in.  You need to have an "eye" for what the right amount of flour is.  I have included a couple of videos to help you with this part.  The dough will still look fairly sticky.

Once the dough starts to pull away, then you start your timer for kneading.  Approx 6-7 minutes on speed 2.  Do the check for Gluten development (see video tutorial)

Wipe down counter and pans with coconut oil.   Dump dough out onto greased counter and shape loaves, place in pans and cover with a dish towel.


Let rise 30-45 minutes until bread has risen above the edges of the pan. Warning:  Do not over rise, or bread may fall.   If it does fall, remove the dough, knead breifly, reshape and let rise again. Bake at 350 degrees for 30 minutes or until deep golden brown.    Makes 3-4 loaves depending on the size of the pan.


Now I was thinking too that I'd like to have a bit higher loaf.  This bread was light and fluffy, and did rise sufficiently, but if I divide the dough into thirds instead of fourths I would have a bit larger loaf that would be better for Sandwiches.  So I will do that next time and ad the photos.

Also I am including some clips of different stages of the dough so you can tell what its supposed to look like.  The first clip is where the dough starts pulling away from the sides.  Second I show you how to check for a "dough window" to be sure the gluten is developed enough.


Feb 10, 2013

Basic Green Smoothie Recipe

Green Smoothies have been a huge "trend" in the health movements as of late, and really with good reason.   The American diet leaves a lot to be desired with all of our pre-packaged, convenience foods and high paced lifestyles.  We simply don't get the servings of fruits and vegetables that we need to maintain optimum health.


Put approx 2 1/2-3 cups filtered water in t your Vita Mix (or other HIGH SPEED blender)
2-3 T. Honey
Juice from 1/2 lime
Start adding fresh washed, organic greens, such as spinach, chard,  & kale.
You ad greens and blend until the volume reaches  5 1⁄2 cup line:
Puree greens mixture until very smooth.
Gradually add fruit until the container is very full, blend again until smooth:
1-2 frozen bananas
1-2 cups frozen mixed berries any other fruit to taste


You can also ad in any number of mix ins based on your tastes, preferences, and possible specific health needs:
1T.  Spirulina
2T. Protein Powder  (I prefer Sunwarrior)
2T. Dr. Schulze Super Food or other Greens powder when fresh greens are limited   
2T. Flax Seeds or Flax oil

 (Left:  Green Smoothie Bouquet)


 BENEFITS OF GREEN SMOOTHIES:
As fantastic as raw greens are, we would have to chew for a very long time with each bite to get them to the creamy consistency necessary to take advantage of all the nutrition they hold. That's because nutrition lies within the plant's cell walls and plant cell walls are one of the strongest things in nature.

That’s where the green smoothie comes in...You won't, or can't, take the time to chew those green enough and it's hard to eat a bunch of kale for a meal. Making green smoothies enables you to consume more greens and allows your body to use the nutrients within them. High speed blenders, such as a Blendtec Total blender or Vitamix 5200, are great green smoothie blenders as they break down whole foods to the cellular level and beyond, making the bounty of nutrients readily available for your body.

If budget is too tight for this, I have found that “Back to Basics” regular blender, AND Ninja blenders... do better than other inexpensive or low speed blenders.
"Okay." ... you say. "So how good for me are they?" ... you ask...
Green smoothies have significant amounts of:
* protein * calcium * folate * iron, magnesium, manganese, zinc, copper * vitamin C, vitamin K, vitamin A * vitamin B1, vitamin B2, vitamin B3, vitamin B5, vitamin B6 * vitamin E * omega 3 fatty acids * potassium * tryptophan * dietary fiber * and more

Best of all these things are delivered to us in green smoothies as natural whole foods via the closest source to the life giving sun and they are never pasteurized.
Green Smoothies DO NOT have:
cholesterol, saturated fat, hydrogenated oils (trans-fats), MSG, GMOs, added hormones, antibiotics, artificial color, artificial flavor, artificial sweeteners, preservatives, nor refined sugar.
Green Smoothies are in NOT associated or linked with disease such as cancer, heart disease, anemia, diabetes, high blood pressure, obesity, arthritis, constipation, gallstones, indigestion, stroke, varicose veins nor piles.
Drinking green smoothies helps the body to prevent and heal disease such as those listed above and more.
People who have added green smoothies as a regular part of their "normal" diet report having:
* more energy * less body aches and pain * normalized blood sugar * reduced or "cured" insomnia * increased libido * clearer thought * better vision * regular bowel movements * less acne * less illness * easy weight loss * reduce bad food cravings * balanced body PH * reduced craving for coffee and caffeine ... and the positive benefits goes on.
The smoothies you make are never pasteurized!
Why is that a big deal? Because pasteurization is a high temperature process that destroys living enzymes and nutrients. So while you think that expensive, fancy bottled smoothie you bought at the store is sooooo good for you... the fact is, it is nowhere near as good for you as it could be.
Different greens have a different level of flavor. If you are new to making green smoothies then stick with the milder flavored greens like spinach, chard or romaine. Moderately flavored greens include kale, swiss chard and collard. More strongly flavored greens include dandelion, mustard- greens, beet-greens, etc...

The above taken from: http://gotgreensrevolution.com/green-smoothie.html For detailed info on specific greens: http://gotgreensrevolution.com/greens-guide.html

Books to read:
“Green for life” Victoria Boutenko;
“The Green Smoothies Diet Book” Robyn Openshaw.

Feb 4, 2013

A surprise for me!

 I got a fun new surprise today!   Hubby was over at his parents helping out with some stuff around the house, and his mom sent him home with this!   FOR ME!  :-)

I didn't even know there was a NEW Magic Bullet! (Actually called the Nutribullet) Its hard to tell in this photo but the cups and ring size are quite a bit bigger than the original Magic bullet.   Not that this alone would be a selling point, but I have had the MB for quite a while and it is usually too small for what i want to do, leading me to overfill it and cause a mess.   So This morning I got it out to try it and filled it with fresh goat milk from the farm, added some frozen strawberries and about a tablespoon of Agave.   Yumminess!  

It works great too!  When I first opened the ring the smoothie was almost as thick as Ice cream.   I was surprised because the old MB would not have been able to do anything with that.  I would have had big chunks of unblended strawberry.  This whizzed it all up in a jiff!  I added a bit more milk and started it again, to get the perfect consistency.
 
Boxed up the old MB and all 97 accessories that go with it. (Seriously cleaned out two shelves in my kitchen - I actually have two complete sets, ask me why.   No idea.)  Will be selling it on the local online classifieds to recover some cash for something else.  Love to do that.

THANKS MOM!


P.S.  I took my magic bullet to Ireland last year because I was determined to make my green smoothies EVERY day!  On the right, there I am (in my hotel room) with fresh Kale from a local market packing it into my green MB.   It tasted pretty gritty, ick!  But I still drank it every day.  Will be interesting to see if this new one can break up the greens like my VitaMix.   Stay tuned!


Nutri Bullet NBR-12 12-Piece Hi-Speed Blender/Mixer System

Please be sure to leave your comments and feedback below!  Those comments will be read and used to determine the direction of the blog!  Thank you for reading! 

Jan 30, 2013

Multi-Grain Banana Oat Bread


  Multi-Grain Banana Oat Bread

    1.5 cups Evaporated Cane juice or raw sugar
   
3 eggs
    1 cup applesauce
    1 teaspoon vanilla
    2 cups ripe mashed Banana or shredded zucchini 

    1/4 cup butter, melted 
    2 1/4 teaspoons ground cinnamon
    2 cups Multi - Grain Flour
    1/2  cup coconut Flour
    1 cup rolled oats
    1 teaspoon baking powder
    3/4 teaspoon salt
    1/2 teaspoon baking soda
    1 cup chopped walnuts or pecans (optional)


I actually tripled this recipe so I wouldn't have to make it again soon.  You will find that is pretty common with me.  If I'm going to go to all the trouble to make something, I'm going to make enough to feed my little army for a month!

Now I apologize, but I didn't get pictures of the process for this recipe, and I will start doing more photos on my very next recipe.  But this one is pretty easy, so don't stress, I think you can handle it.

Simply crack your eggs into your Bosch or other mixing bowl and mix them on speed 2 or 3 for 30 seconds or so until the eggs are foamy.   Then add all of the rest of the ingredients on the list down to the butter (including the butter).   Turn your mixer back on low just long enough to combine everything well and mash the bananas if you didn't pre-mash them.  I have found in a Bosch or Kitchenaid you can really skip the manual mashing stage if your bananas are ripe enough.  At this point you can preheat your oven to 350.

Then dump in all the remaining ingredients at once, EXCEPT for the walnuts.

Again turn on the mixer long enough to combine everything well.   Add your walnuts, mix again, and BOOM!  Your there!

Now this recipe was adapted from a recipe I found on Pinterest at the Better Homes and Garden website  But Like I said, I change EVERYTHING, and I think it tastes better and is much healthier with the changes I've made.


Now for the fun part!   Decide which pans you want to use.   I made these awesome squares with my new Silicon pans from Target online.   But I also did some in Bread pans as well.  Now my kids can grab a square on the way out the door for breakfast, or easily take one for lunch.  (What?  You ask, Banana bread for breakfast?  Its HEALTHY Banana bread, remember?   No white flour garbage.  Whole grains!)

The squares took around 50-55 minutes to bake, whereas a full size loaf (9x5) was about 90 minutes.   The key is that when inserting a thin, sharp knife to test, the blade should come out clean.  If its still gooey, it needs to cook longer.   The crust of the bread can get pretty dark, but that just makes it taste even better.


Now remember, I don't do this for fun, but you have to admit looking at those cool squares sort of makes you happy.  And Oh Man!  They taste good!  See you next week! 

Please be sure to leave your comments and feedback below!  Those comments will be read and used to determine the direction of the blog!  Thank you for reading!